Pages

Sunday, February 26, 2012

Sunday Craft Project


Transferring Pictures onto canvas


Let me start off this post with the fact that I've been researching the many ways to transfer a picture onto canvas ever since I saw them posted onto Pinterest.   There are so many ways to accomplish this task, however, I was limited with the fact that I have an ink jet printer at home.   So that being said -  I found several posts on-line describing different ways to transfer pictures to canvas using a ink jet printer.

Today I set some time aside to test out two of these methods of transferring pictures.  The first process was using tracing paper and the second process was using tissue paper.  The steps I used for both process are listed below.

Materials Needed


Canvas
Modge Podge Glue
Foam brushes
Tracing Paper/Tissue Paper
Photo Shop Elements/ Photo Shop
Picture


Both of these methods preparations a very similar.   First I took a piece of tracing (or tissue) paper and wrapped it around some heavy card stock.


I taped the edges onto the back of the card stock as shown above.   Next I place the covered card stock into my printer with the back of the card stock facing up.


I opened up my picture in my Photo Shop Elements 10 program and resized the picture to print out 8 x10".


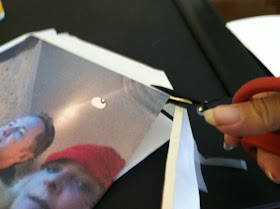
Once printed I cut the picture out and coated the canvas with Modge Podge.  Then I placed the picture onto the canvas being careful not to crinkle up the paper.  Tips - I found that when you coat the canvas with the Modge Podge that it helped to let it sit for a few minutes before putting the picture onto the canvas.  Also I learned that with the tracing paper method it was better to put a second coat of Modge Podge over the picture once it was placed on the canvas but it was not helpful to complete this step when using the tissue paper.  Another thing I found out while doing this is that you do not want to over load the canvas with the glue because it will cause the ink to bleed.  I found with a light touch and minimal amount of glue I had a better result.


For the tracing paper method I found it help to smooth out the air bubbles using a gift card I had laying around the house.  I would not suggest to do this with the tissue paper method because it will cause the paper to tear.


THE FINISH PRODUCT


I have to say that the out come from both methods I was not pleased with.   However, I can say that I have a few things that I would do differently if I did use either of these methods again.  Also like I said above I have a couple of other methods that I would like to experiment with first before I commit to one certain method.  This project was and is a project with a learning curve.   I think once I get the technique down I will love the results as for now I think I will keep searching for a different method to accomplish this.  Now here is a peek at my results using the Tracing Paper Transferring Method and Tissue Paper Transferring Method.


Above is the Tracing Paper Method.  You can see that there is a lot of wrinkles. I believe the reason for that is that I did not wait for the glue to set up before I put on the picture.  Also it is very important to make sure you have an even brush stroke when putting the glue onto the canvas.


Above you will find the Tissue Paper Method.  I think out of the two methods I like this one a little bit more. I don't know if you can see but there are some wrinkles on this picture too but not as much as when I used the tracing paper.  Some of the things I would do different with this method is -  I would not put a second coat of Modge Podge over the picture I would stop with just putting it onto the canvas (reason being that the ink did bleed a little).  Secondly I would have made the picture a little bigger so that it would of wrapped around the edge of the canvas.

Stay tuned to see how my other methods turn out.  Until then thanks for stopping by.


Friday, February 17, 2012

Enabler Alert


There in, There in!  The Project Life page protectors style "A" are restocked on Amazon today.  I am so excited I've been waiting for these to be restocked.  Also those cute pocket pages are restocked too.  This is turning out to be a very good day in the land of Project Lifer's.
Photo Pocket Pages - Big Pack of Design A (60 Pages)


Thursday, February 16, 2012

Project Life

Just dropping in with a Project Life update.  So far so good - I have managed to keep up with it so far.   I can't wait for the products to come in so that I can get my hands on the page protector set "A".  I'm not to happy with my album so far, but I didn't want to just sit back and wait for the page protectors to come back in stock so I went head and used some of the new page protectors that were available at the time I ordered my Project Life kit.   Here is a peak of my progress so far:

                                                            My Title Page

                                                           Week One
                                                        I used C-Line flap protector


Week Two and Three - (not a lot of pictures for week three)


Week Four

I used 8 x11 page protector to include the letter my daughter wrote to the President. On the other side I put my son's Honor certificate from the Dean of his university.

Week Five


Week Six

I took a cue from Ali Edwards and did a Day in Life of my daughter.


Carrie

Wednesday, February 8, 2012

Goodbye Cricut

Hello Cameo Silhouette!


Well Happy Birthday to myself people!   Goodbye Cricut - Hello Cameo Silhouette !  Yes that's right I am joining in on the band wagon.  Happily hopping on it I guess you can say.   My Cameo should be arriving here sometime next week and I'm so excited.   Prior to me buying my Cricut I owned the original Silhouette, however, I hated the fact that it couldn't cut anything bigger than a 6 x 12 image.  So I ditch my beloved Silhouette and hopped on the Cricut band wagon.  I thought I would be satisfied with the Cricut but to tell you the truth I was always looking back at my Silhouette wishing it would grow.  I wasn't really thrilled with how Cricut cuts small images and I always loved the idea of buying individual images rather than a cartridge which I almost always only liked a few images that were on the cartridge any ways.   I miss checking out what Kerry Bradford was up to on her blog and store too.   Well I don't have to worry about that any more thank haven for that.   Let the count down begin!!!!!  

Monday, February 6, 2012

Owl Pillow

Hi everyone;

I'm just popping in with a little Valentine gift I made for my daughter today.  I would love to share with you how I made it,


Materials Needed

Fabric (Pink from JoAnn Fabrics)
Accent fabric (Had laying around the house from another project)
White felt
Black felt
Coordinating Thread


First of all I was inspired to do this project by watching a Youtube video made by diydish.com you can get the pattern here., however, as usually I have modified it. If you go to their blog you can down load the pin cushion pattern (I blew it up on my copier a little).

First I pinned the pattern to the fabric, then I cut it out the owl's body.  

Once that was done I continued by cutting out both of the owl's wings from the pattern.
I pinned it onto one of the accent fabric and cut it out.


I did the same with the beak and the eyes,

After sewing on the wings, beak, and eyes I pinned right sides together and sewed
the body of the owl together leaving bottom opened to turn right side out and to stuff
It's a simple and fun project to do

Happy Crafting

Carrie

PS:  This was posted to Today's Creative Blog and Not Just a Housewife, Tatertots and Jello