Transferring Pictures onto canvas
Let me start off this post with the fact that I've been researching the many ways to transfer a picture onto canvas ever since I saw them posted onto Pinterest. There are so many ways to accomplish this task, however, I was limited with the fact that I have an ink jet printer at home. So that being said - I found several posts on-line describing different ways to transfer pictures to canvas using a ink jet printer.
Today I set some time aside to test out two of these methods of transferring pictures. The first process was using tracing paper and the second process was using tissue paper. The steps I used for both process are listed below.
Materials Needed
Canvas
Modge Podge Glue
Foam brushes
Tracing Paper/Tissue Paper
Photo Shop Elements/ Photo Shop
Picture
Both of these methods preparations a very similar. First I took a piece of tracing (or tissue) paper and wrapped it around some heavy card stock.
I taped the edges onto the back of the card stock as shown above. Next I place the covered card stock into my printer with the back of the card stock facing up.
I opened up my picture in my Photo Shop Elements 10 program and resized the picture to print out 8 x10".
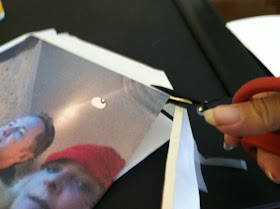
Once printed I cut the picture out and coated the canvas with Modge Podge. Then I placed the picture onto the canvas being careful not to crinkle up the paper. Tips - I found that when you coat the canvas with the Modge Podge that it helped to let it sit for a few minutes before putting the picture onto the canvas. Also I learned that with the tracing paper method it was better to put a second coat of Modge Podge over the picture once it was placed on the canvas but it was not helpful to complete this step when using the tissue paper. Another thing I found out while doing this is that you do not want to over load the canvas with the glue because it will cause the ink to bleed. I found with a light touch and minimal amount of glue I had a better result.
For the tracing paper method I found it help to smooth out the air bubbles using a gift card I had laying around the house. I would not suggest to do this with the tissue paper method because it will cause the paper to tear.
THE FINISH PRODUCT
I have to say that the out come from both methods I was not pleased with. However, I can say that I have a few things that I would do differently if I did use either of these methods again. Also like I said above I have a couple of other methods that I would like to experiment with first before I commit to one certain method. This project was and is a project with a learning curve. I think once I get the technique down I will love the results as for now I think I will keep searching for a different method to accomplish this. Now here is a peek at my results using the Tracing Paper Transferring Method and Tissue Paper Transferring Method.
Above is the Tracing Paper Method. You can see that there is a lot of wrinkles. I believe the reason for that is that I did not wait for the glue to set up before I put on the picture. Also it is very important to make sure you have an even brush stroke when putting the glue onto the canvas.
Above you will find the Tissue Paper Method. I think out of the two methods I like this one a little bit more. I don't know if you can see but there are some wrinkles on this picture too but not as much as when I used the tracing paper. Some of the things I would do different with this method is - I would not put a second coat of Modge Podge over the picture I would stop with just putting it onto the canvas (reason being that the ink did bleed a little). Secondly I would have made the picture a little bigger so that it would of wrapped around the edge of the canvas.
Stay tuned to see how my other methods turn out. Until then thanks for stopping by.


Hi Carrie, Wow you have been busy :o). I love seeing what you have done. Thanks so much for sharing your finished projects. I have been thinking of trying something like this, but haven't worked up enough courage to start one xoxoxo
ReplyDelete